Unlock the Zest: Crafting Perfect Lemon Bars Every Time
The Quintessence of Lemon Bars: A Delectable Fusion
Our featured lemon bar recipe captures the essence of this beloved treat: a tender, buttery shortbread foundation, crowned with a lusciously tart lemon filling, and finished with a delicate dusting of powdered sugar. The filling's intense citrus notes are achieved by infusing lemon zest directly into the sugar before blending with eggs and lemon juice. A significant advantage of this method is the elimination of the traditional stovetop curd, streamlining the process by allowing the filling to be poured directly onto the warm, baked crust.
Crucial Steps for Flawless Layers: Preventing Seepage
To achieve the distinct layers characteristic of perfect lemon bars, it is imperative to firmly and evenly press the shortbread crust into the baking pan before it enters the oven. Tools such as a flat-bottomed measuring cup or a large offset spatula can aid in this process. Once the crust is baked, allow it to cool for precisely five minutes before carefully pouring the lemon filling over the still-warm crust. This immediate application while the crust retains its heat is critical; it helps to rapidly set the custard, thereby preventing it from seeping into the shortbread base.
Achieving Optimal Firmness and Presentation: Chilling and Finishing Touches
For the lemon bars to reach their ideal consistency, they require a minimum of four hours of refrigeration prior to slicing. This chilling period allows the lemon filling to fully set and firm up. The final flourish, a snow-like dusting of powdered sugar, should be applied just before serving. Applying it too early may lead to its dissolution into the moist lemon topping, diminishing the visual appeal.
Addressing Common Baking Quandaries: Why Layers May Invert
A frequent query among bakers is the phenomenon of lemon bars appearing "upside down," where the lemon filling compromises the integrity of the crust. This typically occurs if the filling infiltrates beneath the shortbread during baking, causing the crust to rise. The solution lies in diligent preparation: ensure the crust is tightly and uniformly packed into the pan, extending completely to the corners. After baking, a swift transfer of the warm crust to the oven with the filling is key to maintaining distinct layers.
Indicator of Doneness: Identifying the Perfect Set
Knowing when lemon bars are perfectly baked is crucial. The lemon filling should appear set around the perimeter while still exhibiting a slight jiggle in the center when the pan is gently shaken. This usually takes between 20 to 25 minutes. The filling will continue to firm up considerably as the bars cool and chill, so resist the urge to overbake. A minimum of four hours of refrigeration is still recommended before slicing.
The Role of Refrigeration: Storage and Shelf Life
Refrigeration is essential for lemon bars. Once cooled, they should be stored in the refrigerator until ready to serve, and any leftovers must also be kept chilled. These bars can be prepared up to two days in advance; however, for the best presentation, delay the application of powdered sugar until just before serving to preserve its pristine appearance.
Exploring Citrus Variations: Using Meyer Lemons
For those seeking an alternative flavor profile, Meyer lemons can certainly be substituted. It is important to note that Meyer lemons typically offer a sweeter, less intensely acidic juice compared to conventional lemons. Consequently, the resulting lemon bars will possess a milder, more floral lemon essence, offering a nuanced taste experience.
Adjusting for Pan Sizes: Adapting the Recipe
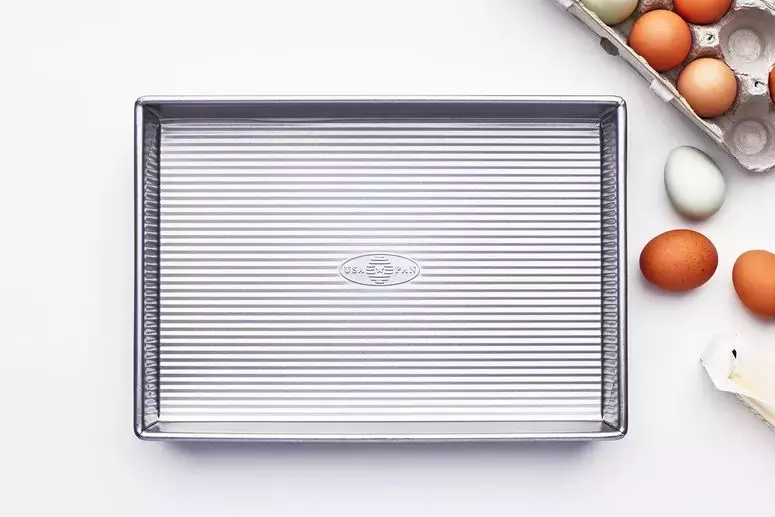
While an 8x8-inch pan is ideal for achieving thicker lemon bar layers, a 9x9-inch pan can also be used effectively. When opting for a larger pan, be aware that both the crust and filling will be slightly thinner. To compensate, begin checking for doneness earlier than the suggested baking times, adjusting as needed to prevent overbaking.
Precision in Preparation: Crafting the Crust
Begin by positioning an oven rack in the center and preheating your oven to 325°F (160°C). Line an 8x8-inch baking pan with parchment paper, allowing for an overhang on all sides for easy removal. In a food processor, combine 1¼ cups (156 g) all-purpose flour, ¼ cup (28 g) powdered sugar, and ¾ tsp. Diamond Crystal or ½ tsp. Morton kosher salt, pulsing until well blended. Add 7 tablespoons of chilled, cubed unsalted butter and pulse until the mixture resembles coarse sand with small butter pieces. Incorporate 1 large egg yolk, pulsing until just combined; the mixture will appear dry but should hold its shape when squeezed. Transfer this mixture to the prepared pan, spreading it evenly, and firmly pack it down with a flat-bottomed measuring cup or glass, ensuring it reaches all corners. Bake until golden, approximately 27–29 minutes. Allow to cool for precisely 5 minutes.
Crafting the Lemon Filling: Zest, Eggs, and Liquid Gold
While the crust is baking, prepare the lemon filling. In a medium bowl, combine 1 cup (200 g) granulated sugar and 2 teaspoons of finely grated lemon zest. Use your fingers to massage the zest into the sugar until it is fragrant and lightly tinted yellow, about one minute. Gently whisk in 3 large eggs, the remaining 1 large egg yolk, and the remaining 3 tablespoons (23 g) all-purpose flour until just combined. Stir in ⅔ cup fresh lemon juice, ¼ cup whole milk, and the remaining ½ tsp. Diamond Crystal or ¼ tsp. Morton kosher salt until thoroughly mixed.
Baking and Chilling: The Final Stages to Perfection
As soon as the crust's timer concludes, immediately pour the lemon mixture over the hot crust. This quick action helps to partially cook the filling and prevents the layers from merging. Gently tap the pan on the counter to eliminate any air bubbles from the surface of the filling, then promptly return it to the oven. Bake until the lemon filling is set but still slightly wobbly in the center when gently shaken, typically 20–25 minutes. Allow the lemon bars to cool completely at room temperature, then refrigerate for a minimum of 4 hours until thoroughly chilled. Using the parchment paper overhang, carefully lift the lemon bar from the pan and place it on a cutting board. Cut into 16 squares, and dust with powdered sugar just before serving for an elegant finish. For make-ahead convenience, lemon bars (without powdered sugar) can be prepared up to 2 days in advance, covered, and stored in the refrigerator.
New